


Keypad only REMOTE NOT INCLUDED
Keypad can be sent internationally by FedEx and UPS
Domestic US orders can be sent by USPS and UPS
Installation and repair are for USA and Canada only
 Security policy
No data sold or shared. NO SPAM!
 Economy Shipping
Sent by Letter Mail - No Tracking
 Return policy
90-day money back guarantee
.png) USD
USD
$ Indicates prices are in USD
Replace the keypad in your remote. Requires the removal of the old keypad which is stuck down very well. You will probably need heat to weaken the adhesive. If you are careful the top graphic layer can be saved and re-used. Use a HOT hair dryer or a heat gun on low.
TORX T10 screwdriver is needed to remove the circuit board inside the remote to change out the keypad
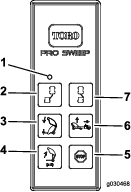
New replacement keypad for TORO Pro Force and Pro Sweep
If you can carefully remove the top graphic layer without damage it can be re-used. It will most likely be curled up. Try warming it up then putting it inside a heavy book or on a flat surface with a weight on top.
(Tip: if any of the black ink comes off the top layer you can fix that using a permanent black sharpie marker on the under side BEFORE sticking the old label down to the provided double sided adhesive pad)
If you can't salvage the graphic layer, a new top graphic sticker is an OPTION in the blue area above. This will be Black with Silver writing label and not exactly like the original.
If you are sending the remote in for installation, this includes re-using your top graphic layer. If your layer is already damaged then a replacement will be needed. Please contact us on how to order this before service.
TORO 125-1300
TORO 125-1301
7693A-24J40MA
Wireless Remote for Pro Force® Debris Blower
Important: Read the entire procedure before performing the procedure.
The remote control must establish communications with the base unit before you can use the system. The remote control is associated to the system base unit before leaving the factory using the associate procedure. In situations where it is necessary to re-establish remote control-to-base unit communications (e.g., introducing a new or spare remote control to an existing base unit), do the following.
Note: Associating the remote control to a different base unit disassociates that remote control from the original base unit.
Remove power from the base unit.
Stand near the base unit in unobstructed, clear line-of-sight with the remote control in hand.
Simultaneously press and hold the OFFSET LEFT and OFFSET RIGHT buttons. The LED blinks about once per second.
Continue to hold both buttons until the LED begins blinking about twice per second.
Release the buttons.
Press and hold the OFFSET LEFT button. The LED blinks about twice per second.
Continue holding the OFFSET LEFT button and turn the key start to the RUN position. The LED turns solid if the procedure is successful.
Note: This could take up to 20 seconds.
Release the OFFSET LEFT button.
The system is ready for use with that particular remote control.
Keypad only REMOTE NOT INCLUDED
Keypad can be sent internationally by FedEx and UPS
Domestic US orders can be sent by USPS and UPS
Installation and repair are for USA and Canada only