

Ships World Wide by Letter Envelope
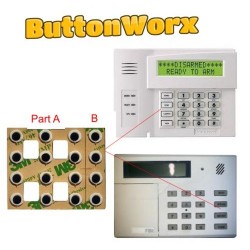
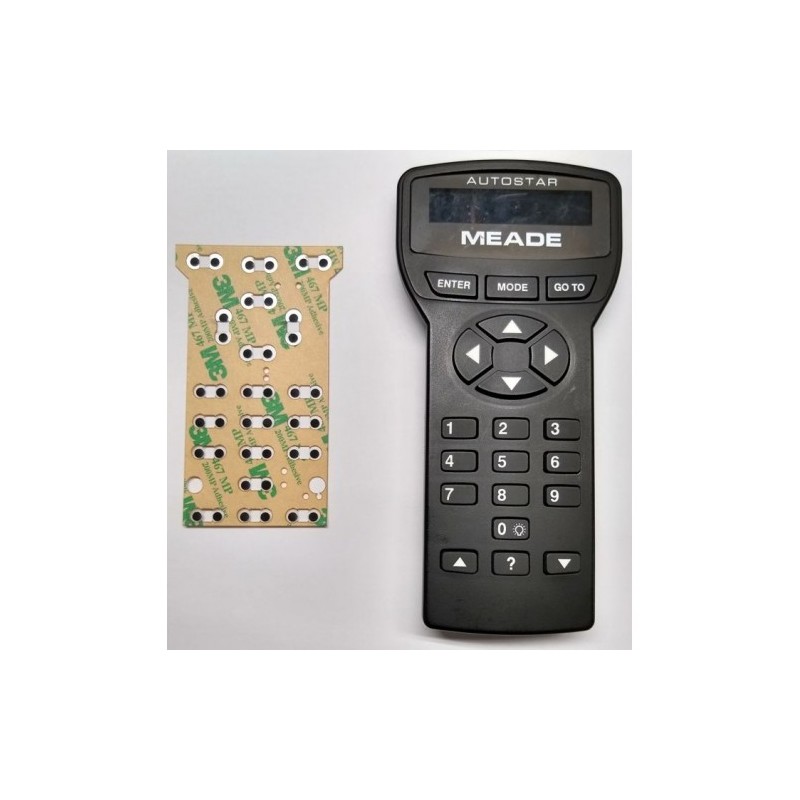
ButtonWorx™ Button Repair Kit
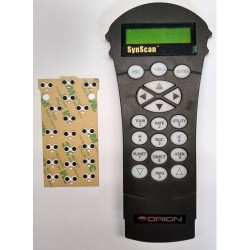
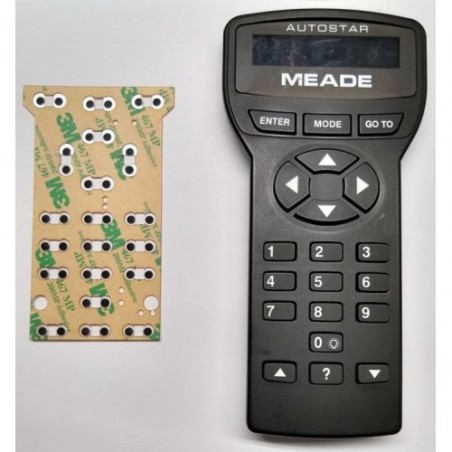
MEADE AUTOSTAR and AUTOSTAR-II
497 EXT
494, 495
Do-It-Yourself
Permanently repairs rubber keypad buttons by replacing the conductive material.
Your buttons fails when the conductive pad wears out and silicone oils seep from the keypad. This gooey paste blocks electrical conductivity and stops the switch from working.
The ButtonWorx membrane keypad blocks dirt and oil from reaching the circuit board and offers a new conductor that cannot break down like rubber conductors do.
Note: This is for repairing hard to press buttons. If all your buttons stopped working one day, then the remote is broken (not the buttons) and needs repair
Our membrane keypads are custom cut for each model.
They will not work in any other model.
Good day.
I just received 2 inserts for Meade Telescope hand controller boxes.
Installed them last night in short time with no issues. Great instructions. Thank you.
They work flawlessly and I highly recommend your product to anyone who has tired out push buttons on any hand pad controller.
These now work as good as new. Probably better. Almost no effort to push the buttons now and the telescope gets the signal immediately and without issues. Thanks for your product and your effort to provide it at very reasonable cost and in a timely manner.
Great product. Great service.
Cheers,
B***** R*****
Gimli, Manitoba, Canada
Meade telescope owner.
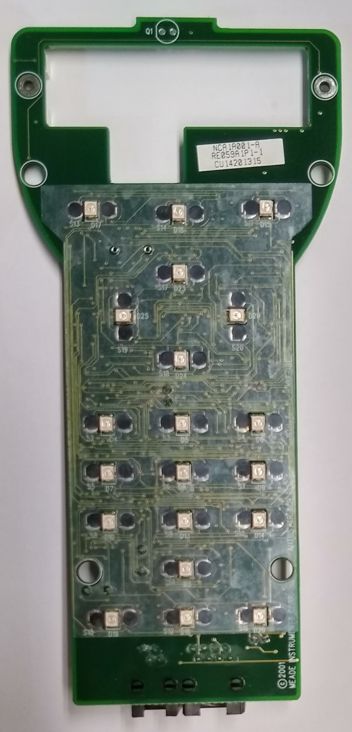
This is what it looks like when you remove the back cover

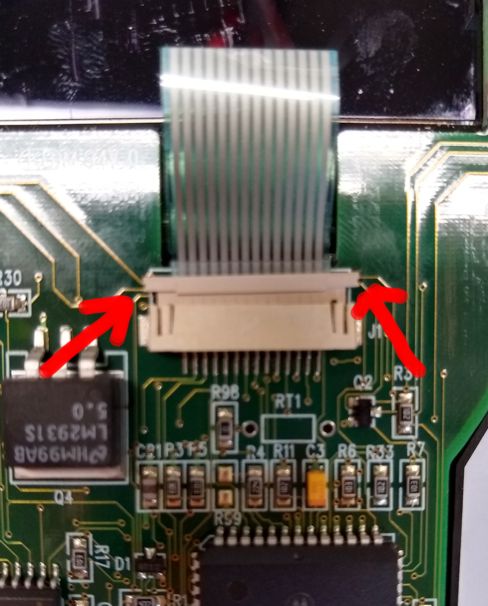
You have to unplug the LCD to install the repair pad
Slide the sides of the plug back 1-2mm carefully. The picture shows the plug after it has been opened. The cable will easily pull out.
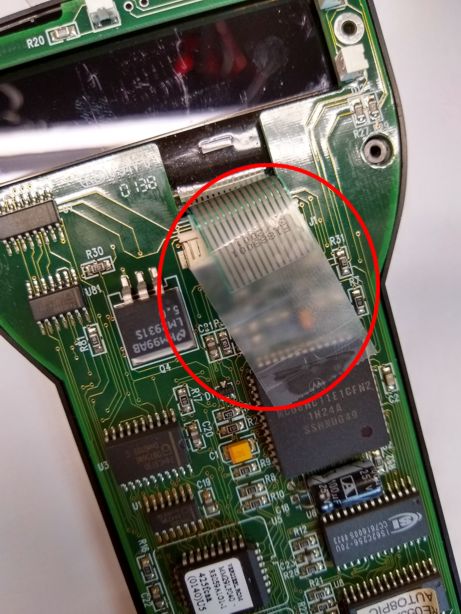
When putting the unit back together you just put the LCD cable back in as shown and then push the slide-out back in.
The end of the cable has a small rigid support that is almost entirely hidden before you close the connector.
You can just see the top of that support peeking out above the plug in the photo below.
IMPORTANT: Clean the button contacts with Isopropyl alcohol and q-tips.
This shows the ButtonWorx™ membrane installed over the buttons
Install the membrane as flat as possible. Just lay it over the PCB after lining up the holes and leave it alone. DO NOT press down to "stick it better" That is not necessary and you can create problems with buttons caving in which could make them activate without pressing them first.
When re-assembling the back housing you need the LCD cable to be out of the way. It's hard to get it to not stick inside the LCD display so I taped it back with a small piece of scotch tape.
the 497 Autostar, required for the ETX90, ETX125, LXD and LX90
the 494 Autostar, used by the DS-, DSX- and ETX60/70/90 models
Thank you
Order was received in 18 days from the States to Vancouver Island rural. Appreciate the option of repairing my remote. Thanks for the service.
24 mars 2023 to 30 mars 2023
6 days to get the new key pad very fast for envelope and crossing country.
Thank Ben
Excellent for LX200
I've done 2 LX200 keypads with this item. The 2nd one was basically unusable. Now it works perfectly. Thanks for making this product.
Ships World Wide by Letter Envelope